In this post, you’ll learn how to add a security layer to protect your users’ data if you’re currently using, or you’re planning to use, the Formilla JavaScript API. We’ll also show you how to enable the Formilla REST API — which is disabled by default — to generate your secure token, and what you need to do to successfully use the REST API.
Before proceeding further, be sure to check out both API posts if you haven’t already.
Note: if you’re using Formilla with a Wix website, integration of your data is not supported and the security settings referenced below will not be displayed.
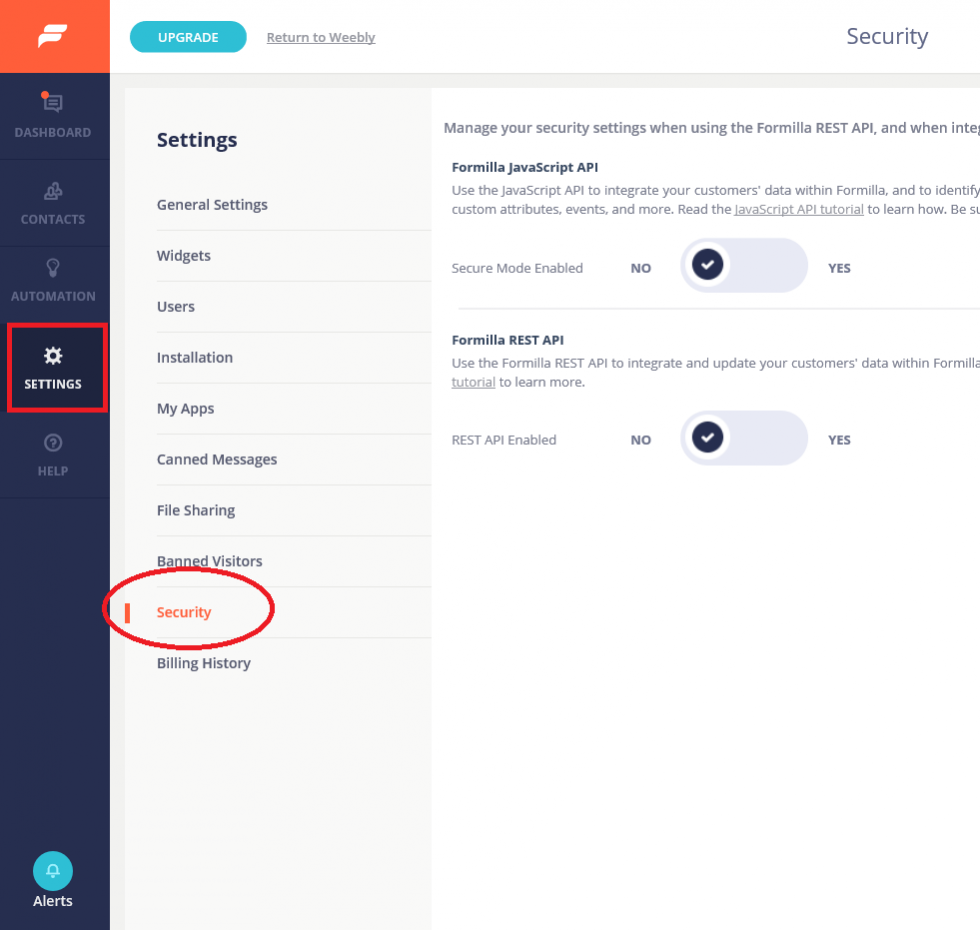
To begin, we highly recommend enabling secure mode when integrating your users’ data with the JavaScript API. This will maintain the integrity of your data, and ensure that any JavaScript calls to Formilla are actually coming from you, and not being impersonated by someone else.
Don’t worry, all major platforms and languages will have a method to help you generate the HMAC. Below, I’ve listed a few examples that you may find useful.
You’ll notice the User ID is being used to generate the HMAC, however if you’re not using a User ID (e.g. a customer ID, account ID, some other unique identifier, etc.) to uniquely identify each logged-in user, then email address is required as the identifier and should be used when generating the HMAC.
$data = $user->id;

$contact_hmac = hash_hmac('sha256', $data, 'CSCD537A-4A00-4007-AB78-C3F3B17A730A');
var keyBytes = Encoding.UTF8.GetBytes("CSCD537A-4A00-4007-AB78-C3F3B17A730A");
var valueBytes = Encoding.UTF8.GetBytes(User.Id.ToString());
var hmac = new HMACSHA256(keyBytes);
var hmacBytes = hmac.ComputeHash(valueBytes);

var contactHmac = BitConverter.ToString(hmacBytes).Replace("-", string.Empty);
import javax.crypto.Mac;
import javax.crypto.spec.SecretKeySpec;
import org.apache.commons.codec.binary.Base64;
...
try {
    String secret = "CSCD537A-4A00-4007-AB78-C3F3B17A730A";
    String value = User.Id.toString();

    Mac sha256_HMAC = Mac.getInstance("HmacSHA256");
    SecretKeySpec secret_key = new SecretKeySpec(secret.getBytes(), "HmacSHA256");
    sha256_HMAC.init(secret_key);

    String contact_hmac = Base64.encodeBase64String(
        sha256_HMAC.doFinal(value.getBytes()));
}
catch (Exception e) {
    // Log error
}
Note: please keep in mind that this Java example needs a reference to the Apache Commons Codec package to work successfully.
(function () {
	var head = document.getElementsByTagName("head").item(0);
	var script = document.createElement("script");

	var src = (document.location.protocol == 'https:'
		? 'https://www.formilla.com/scripts/feedback.js'
		: 'http://www.formilla.com/scripts/feedback.js');

	script.setAttribute("type", "text/javascript");
	script.setAttribute("src", src); script.setAttribute("async", true);

	var complete = false;

	script.onload = script.onreadystatechange = function () {
		if (!complete && (!this.readyState
			|| this.readyState == 'loaded'
			|| this.readyState == 'complete')) {
		    complete = true;
		    Formilla.guid = 'cscd537a-4a00-4007-ab78-c3f3b17a730a';

		    // Contact attributes
		    Formilla.contactAttributes = {
			UserId: "100",                         // Contact Id
			Email: "mikethompson@gmail.com",       // Contact email address
			FirstName: "Mike",                     // Contact first name
			LastName: "Thompson"                   // Contact last name
		    };

		    Formilla.contactHmac = "SET_HMAC_VALUE_HERE"; // HMAC

		    Formilla.loadWidgets();
		}
	};

	head.appendChild(script);
})();
Note: remember, when integrating your users’ data into Formilla, you need to have the script code installed manually on your site and should not be using our plugins.
Please be aware that if the generated HMAC is invalid, the user data won’t be integrated into your Formilla account and will cause the script to fail when loading.
As mentioned previously, the REST API must be first enabled if you plan to use it to integrate your users’ data inside of Formilla.
HTTP Method
POST

Request URL
https://api.formilla.com/api/contacts

Header
Content-Type: application/json
formilla_auth_token: eyJDdXN0b21lclNpdGVHdWlkIjoiY3NjZDUzN2EtNGEwMC00MDA3LWFiNzgtYzNmM2IxN2E3MzBhIiwiUHVibGljQXBpQXV0aFRva2VuIjoiQThDOEE4RkQtRTZFNy00QUQwLUI2MzYtMzVDMjM5QkIwQTY4In0=

Body
{
  "UserId": "100",
  "Email": "mikethompson@gmail.com",
  "FirstName": "Mike",
  "LastName": "Thompson"
}
Formilla REST API returns standard HTTP response codes.
(200 OK, 403 Forbidden, 500 Server Error, etc.)
You can learn more about our REST API at this link.
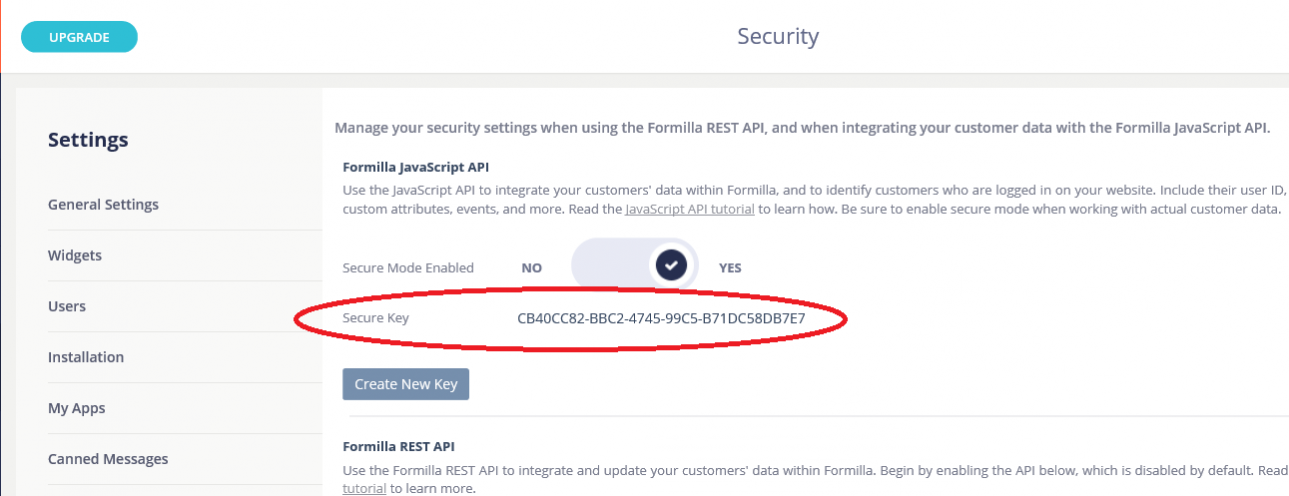
In the event you need to generate a new Secure Key or Token, you can do so by clicking the Create New Key or Create New Token buttons on the Security page, and then click OK on the confirmation dialog that appears. Of course, changing your key/token will require you to update your code to use the new value(s).

As always, please contact us at support@formilla.com if you have any questions 🙂
