The Formilla REST API provides the ability to push customer data from your system to Formilla. By pushing your data into Formilla, you can send automatic email and in-app messages to your customers based on any custom data important to your business.
This post will give you an overview about how to use the REST API, with examples on how to create or update your contact data, what API response codes to expect, and more.
Note: if you’re using Formilla with a Wix website, the Formilla REST API is not supported.
Quickly jump around this post with this index:
The Formilla API is RESTful and responds with standard HTTP response codes to indicate the result of the request. It is disabled by default in your Formilla account, so you can start by enabling it with the steps in this post.
You can use any HTTP/REST library available for your programming language to communicate with our API, such as:
All Formilla API URLs must start with the following base URL:
https://api.formilla.com/api
When you enable the REST API from the Security page, a Token will be generated for your account.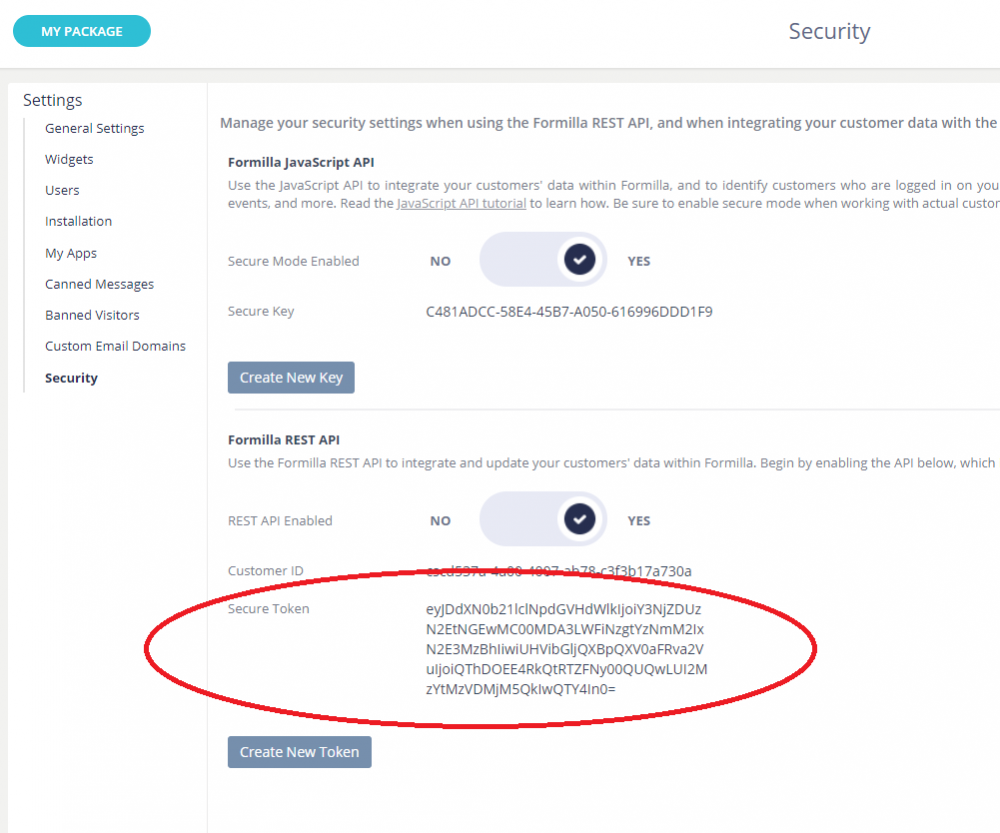
Each request you make to the Formilla API must include the token in the request header.
| Header name | Type | Description |
| Content-Type | String | Describes the nature of the data in the request body. It should always be set to application/json |
| formilla_auth_token | String | The Secure Token for your account. |
Note: of course, be sure to keep your API Token a secret and do not share it with anyone!
Use this method to create a new contact or to update an existing one.
POST /contacts
| Parameter | Type | Description |
| UserId | String | A unique identifier for the contact. It’s required if Email isn’t provided. |
| String | The contact’s email address. It’s required if UserId isn’t provided. | |
| FirstName | String | The contact’s first name. |
| LastName | String | The contact’s last name. |
| Phone | String | The contact’s phone number. |
| SignedUp_date | Date (unix timestamp) | The datetime when the contact signed up in unix timestamp format. |
| IsUnsubscribed | Boolean | Whether the contact is unsubscribed from emails. Default value: false |
| CustomAttributes | JSON | Object that contains key/value pairs. Use this parameter to pass any custom data you want to track about your contacts. |
Check out the following C# example where a new contact is created in Formilla. Please note that the RestSharp library is used in this example.
var formillaContact = new
{
	UserId = "100",
	Email = "tomlondon@gmail.com",
	FirstName = "Tom",
	LastName = "London",
	Phone = "+1 786-233-9885",
	SignedUp_date = 1524823200,
	CustomAttributes = new
	{
		PlanName = "Premium",
		SubscriptionEnds_date = 1565395200,
		CommissionRate = 7.5m
	}
};

var client = new RestClient("https://api.formilla.com/api");
var request = new RestRequest("/contacts", Method.POST);

request.AddHeader("formilla_auth_token", "eyJDdXN0b21lclNpdGVHdWlkIjoiY3NjZDUzN2EtNGEwMC00MDA3LWFiNzgtYzNmM2IxN2E3MzBhIiwiUHVibGljQXBpQXV0aFRva2VuIjoiQThDOEE4RkQtRTZFNy00QUQwLUI2MzYtMzVDMjM5QkIwQTY4In0="); // Replace this token with yours

request.RequestFormat = DataFormat.Json;
request.AddBody(formillaContact);

var response = client.Execute(request);

if (response.StatusCode == HttpStatusCode.OK)
{
    // Contact was added successfully!
}
else
{
    // Handle errors
}
As you may have noticed, this example returns a 200 OK response if the contact is created successfully. See the full list of responses at the bottom of this post.
Remember, you can find your contacts in your Formilla account by clicking Contacts from the left menu.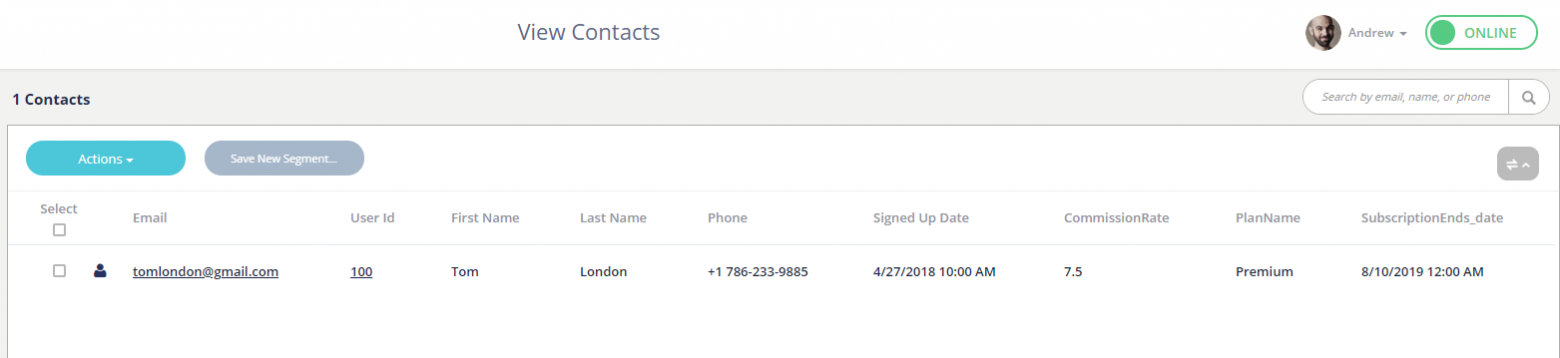
The Formilla REST API returns standard HTTP response codes on each request to indicate the result. Here is a list of them:
| Code | Description |
| 200 | OK – the request has succeeded. |
| 400 | Bad Request – invalid request due to one of the following reasons:
|
| 403 | Forbidden – unauthorized request due to an invalid formilla_auth_token or you’ve exceeded your current package limit of contacts. |
| 404 | Not Found – the requested resource was not found.
|
| 429 | You have reached the REST API max limit.
|
| 500 502 |
Server Error – likely something went wrong on Formilla’s end. |
| 503 | Service Unavailable – API is temporarily unavailable due to scheduled maintenance. |
Please feel free to contact us at support@formilla.com if you have any troubles or questions! ?
