Zapier is an application that connects thousands of other applications together. It does so by allowing for automation to take care of repetitive tasks between two apps that you use. Basically, while one app is doing one task or obtaining information, this is used to in turn automatically perform an action or create information in another app without the need to do manual work in both.
Using Zapier with Formilla will allow you to use information gathered from visitors to your site to perform tasks in thousands of other apps. Here is a list of templates that you can use to get started quickly, or you can reference it for some ideas of how you can use Zapier integration:
In this tutorial we will cover how to integrate Zapier with your Formilla account so that Formilla Live Chat transcripts are ready to use in other applications. We will give two examples of how your chat transcripts can be utilized in this way. First we will cover how chat transcripts can be used with Zapier to add or edit existing subscribers in Mailchimp campaigns. Then, we will go over using Zapier to post chat transcripts to a Slack channel for review by your entire team when needed.
Note: Zapier Integration is not supported when using Formilla via the Wix platform.
How to integrate Formilla with Zapier
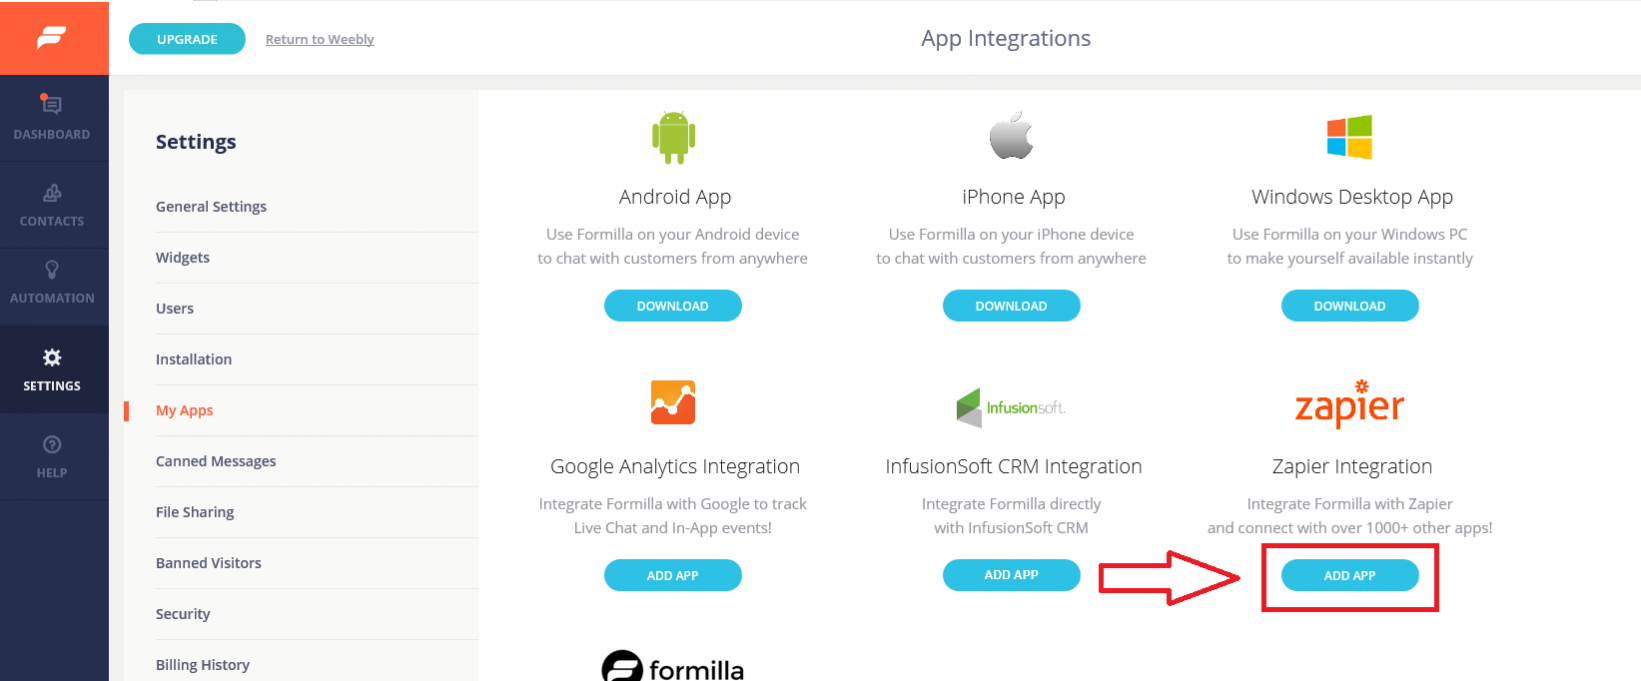
- Inside your Formilla account, mouse over Settings and select My Apps from the sub-menu. Click on Add App under Zapier on the following page.
This will generate an API key which you’ll need later. Go ahead and leave the page open to refer to in a bit.
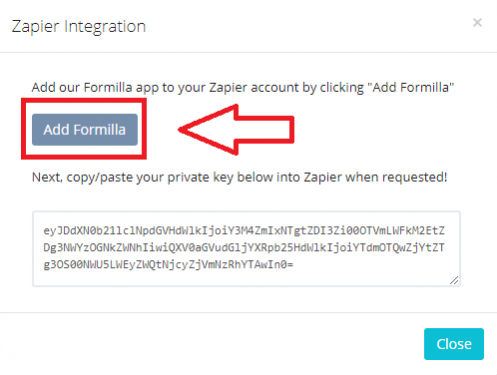
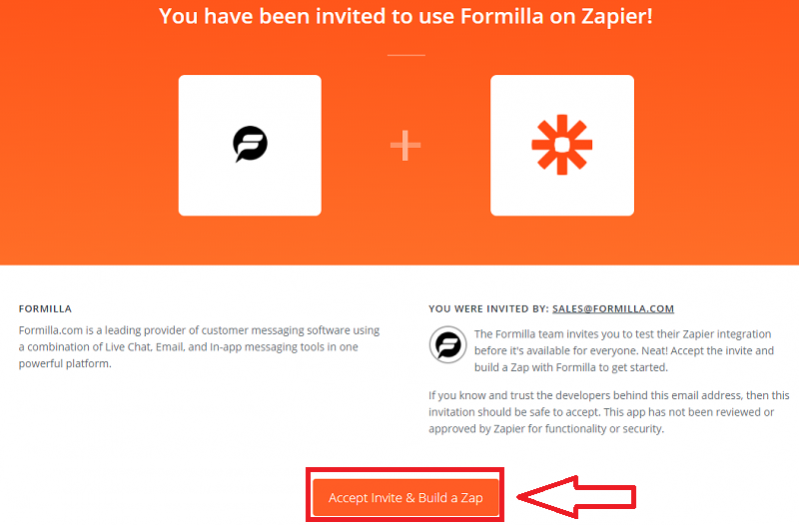
- Click Add Formilla to proceed with the integration. You will be taken to a Zapier screen where you can login with your Zapier account, or you can create a Zapier account if need be.
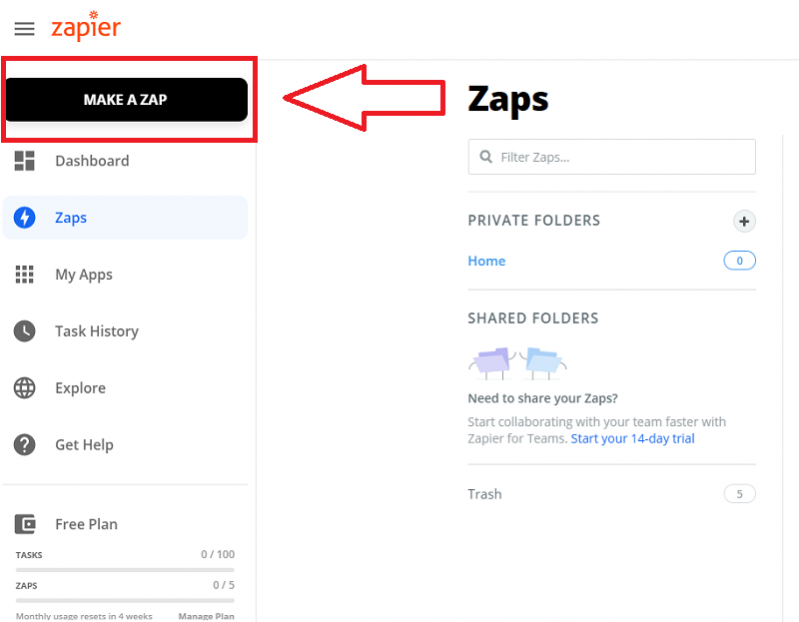
- Once you have finished signing into or creating your Zapier account, you will be navigated to where you can begin setting up your first Zap with Formilla. You will want to click on Make A Zap in the upper left of the screen.
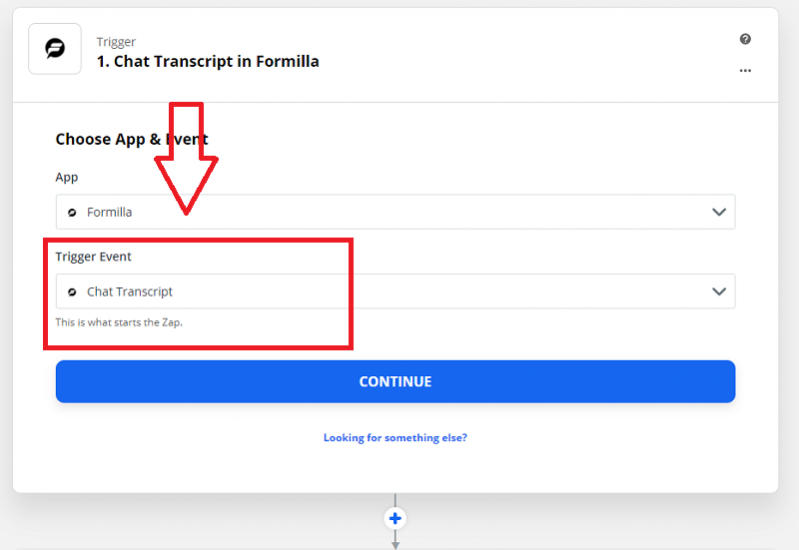
- Enter “Formilla” in the app search field, then click on the Formilla icon.

- In the Trigger Event drop-down menu, select Chat Transcript. Next, click the Continue button.
- Click on the Sign Into Formilla button.

- On the pop-up window that appears, copy and paste the API key that you found in your Formilla account in Step 1 above and click on Yes, Continue.

- Click on one more Continue button, and you will be prompted to test a trigger. Click on the Test trigger button.

- At this point you have a Formilla chat script ready to use as a trigger for actions in other apps. You are now ready to select an Action Step in Zapier by clicking on Continue.

The Action Step is the action that you want another app to perform with chat transcript information provided by Formilla. We will go over two possible examples of action items that can be used.
A) Using Formilla Chat to Add New Subscribers to Mailchimp Campaigns
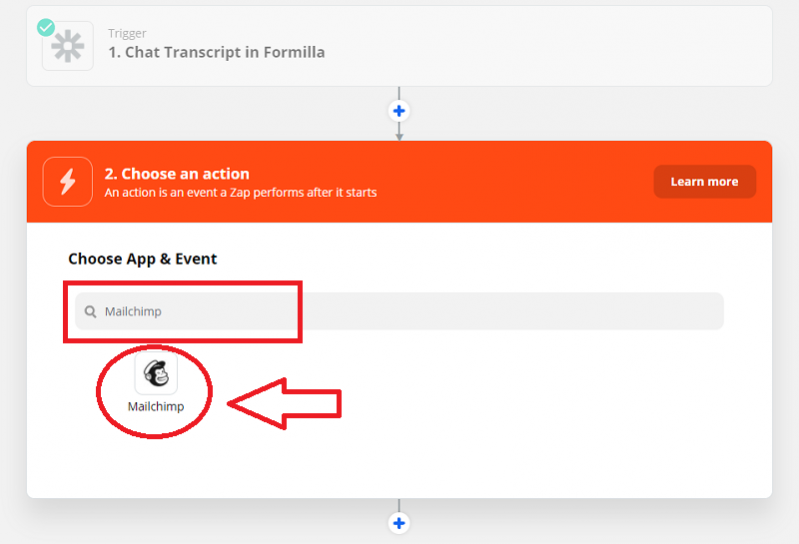
- Start by clicking on the Choose An Action button located below the Chat Trigger section.

- In the Choose App & Event search bar in, search for Mailchimp. Click on the Mailchimp icon to continue.
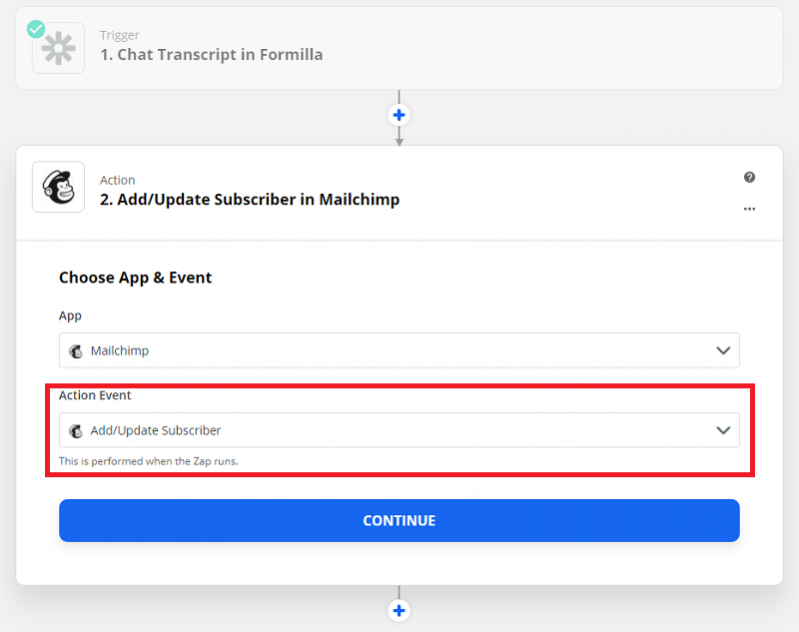
- Select Add/Update Subscriber as the action item and click on Continue.
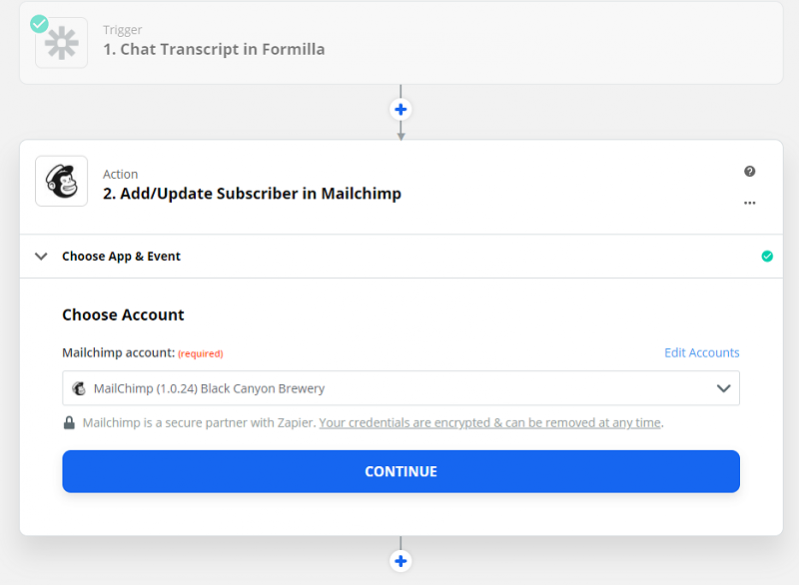
- You be prompted to choose a Mailchimp account. You can select the desired account if you have added Mailchimp before. Simply click on Connect an Account if you have not added a Mailchimp account to Zapier before and follow their instructions.
- After clicking Continue, you will come to a Customize Subscriber screen. Select the audience you want to add subscribers for in the Audience field. In the Subscriber Email field, click on the field to see a list of values you can select to populate this field. Select the Email information here from the drop-down menu.
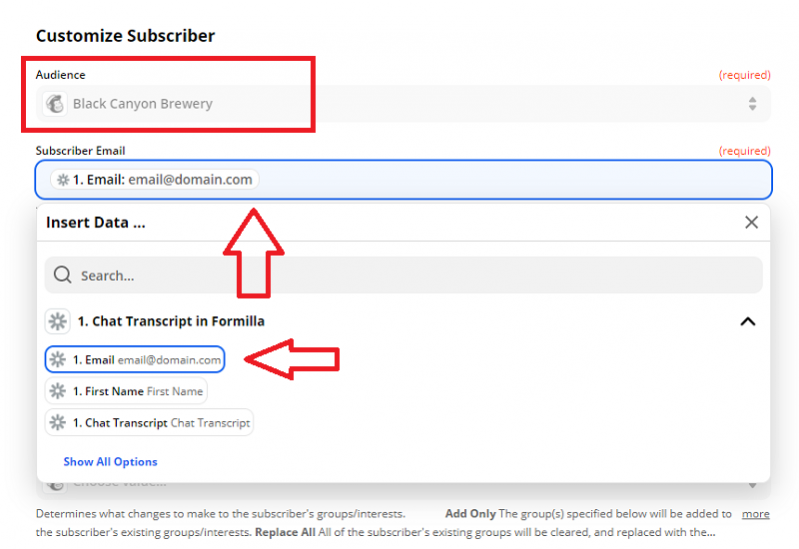
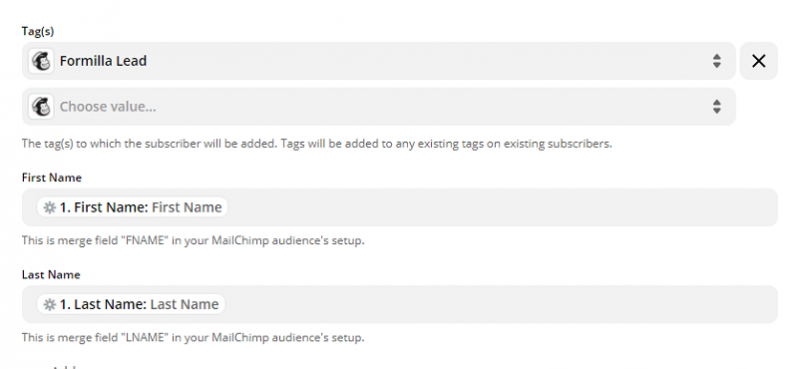
- You can scroll down and enter options for Mailchimp, such as updating an existing contact, tagging as a Formilla lead, etc. For each field that can be populated from a Formilla chat transcript, click on that field and select the matching data. For example, select the First Name data to go in the First Name field and so on.
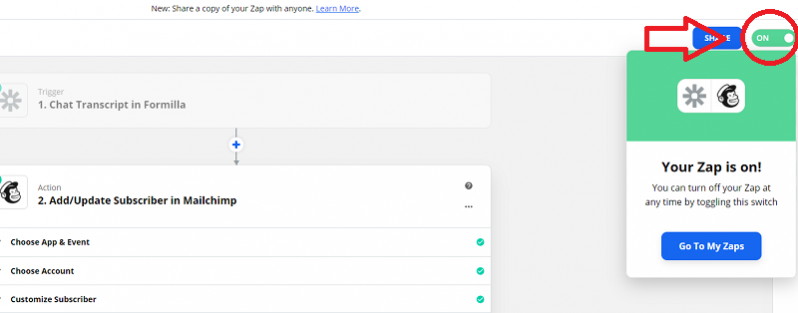
- Press Continue, and on the next screen you have the option of sending a test to your Mailchimp account. Upon a successful test, you can go into your Mailchimp account and see that the contact was added automatically to your selected Mailchimp audience. You can switch on the zap with the toggle switch in the upper right.
B) Putting Chat Transcripts in a Slack Channel
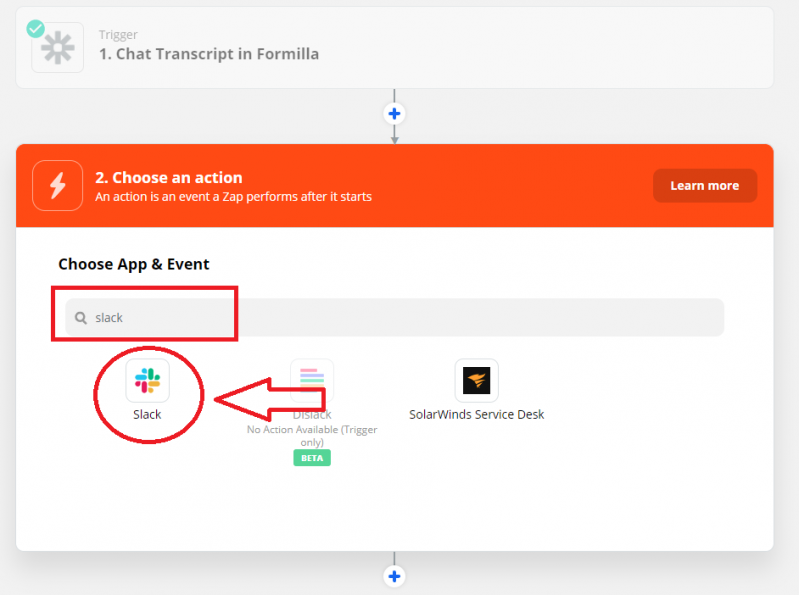
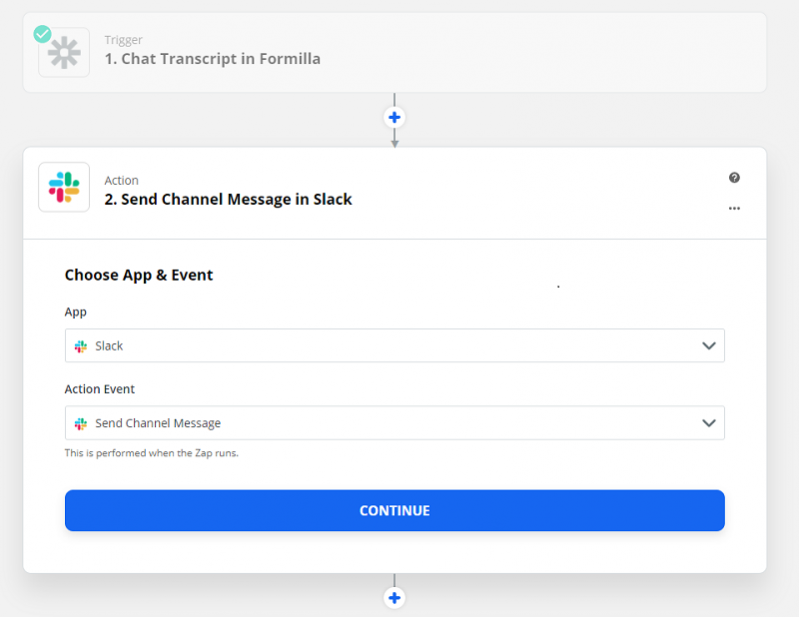
- In the Choose App & Event field in Zapier, enter Slack in the search field. Then click on the Slack icon to continue.
- Select Send Channel Message as the action item. You will come to a Select Slack Account screen where you can select the desired account if you have added Slack before. Simply click on “Connect an Account” if you have not added a Slack account to Zapier before.
- Once your Slack account has been added/selected, you will come to a Customize Channel Message screen. It is a good idea to create a Channel in Slack that is specifically for Formilla Chat Transcripts so that chat transcripts are not populating in a channel already being used for conversations. If you are creating a new channel, you will want to do so inside Slack.
Note: do not manually enter information in the Channel field, you will want to create the channel first, then select it from the drop down menu.

- In the Message Text field, you can choose how the message is displayed in your Slack channel. Here you click on the field to choose values again and not enter any manual information. For best legibility, it is recommended that you place one piece of information per line as pictured.

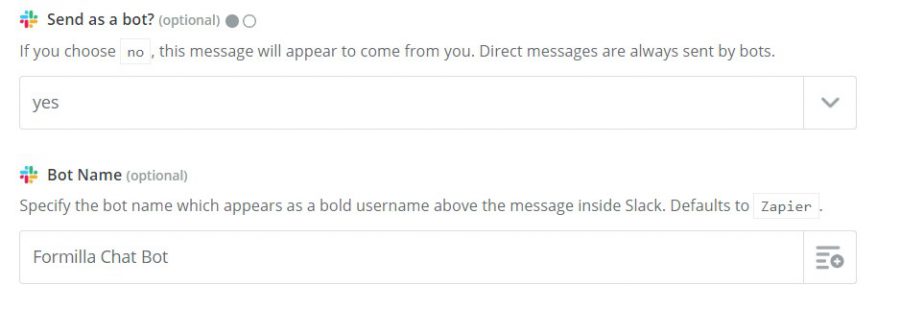
- You will likely want to choose yes for “Send as a bot?” and give it a name so that the messages being sent with a chat transcript appear as coming from a chat bot rather than yourself.
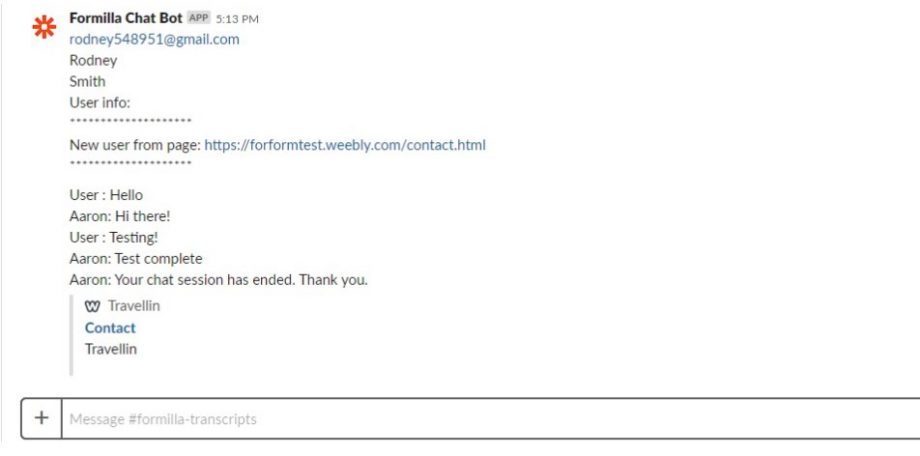
- Press Continue, and on the next screen you have the option of sending a test to your Slack Channel. Upon a successful test, you gan go into your Slack account and see that the chat conversation was added automatically to your selected Slack channel as you can see below. You are done!
Don’t forget to turn your Zap on when you want to start adding chat transcripts to Slack. When this Zap is turned on, all Formilla Chat Transcripts will be sent to the specified Slack channel.
As always please feel free to contact us at support@formilla.com if you have any troubles or questions! ?
