This installation guide will help you install Formilla.com Live Chat Software on your Jimdo website almost instantly.
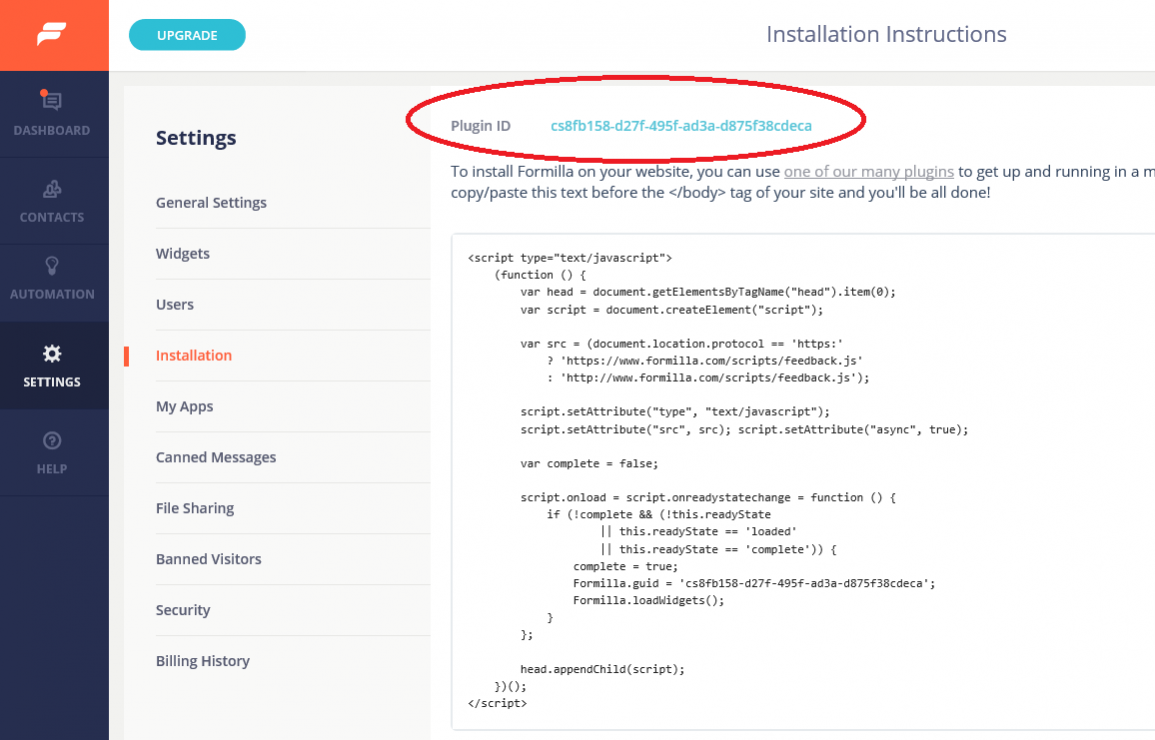
Begin by signing up for a Formilla.com Live Chat account. Upon signing up, you’ll be logged into the Formilla.com admin console and will need to obtain your unique code snippet. To do so, click on “Settings” on the left side, then click on “Installation”. Look at the top of the Installation Instructions section to copy your code snippet, as you can see below. Hang onto this code snippet as you’ll use it in step #3.
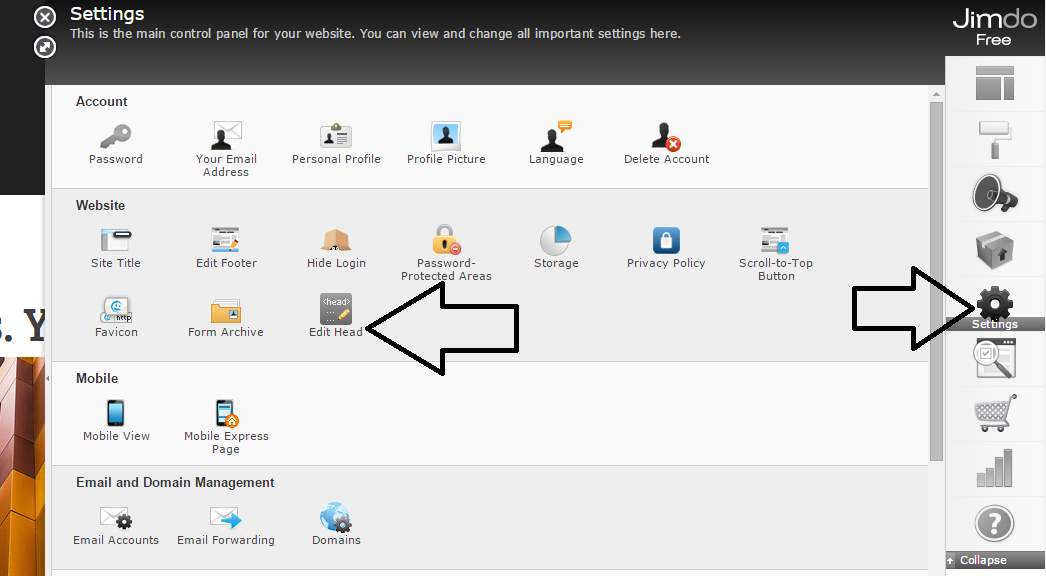
Login to your Jimdo administration panel and click Settings on the right-hand side, then click Edit Head as you can see below.
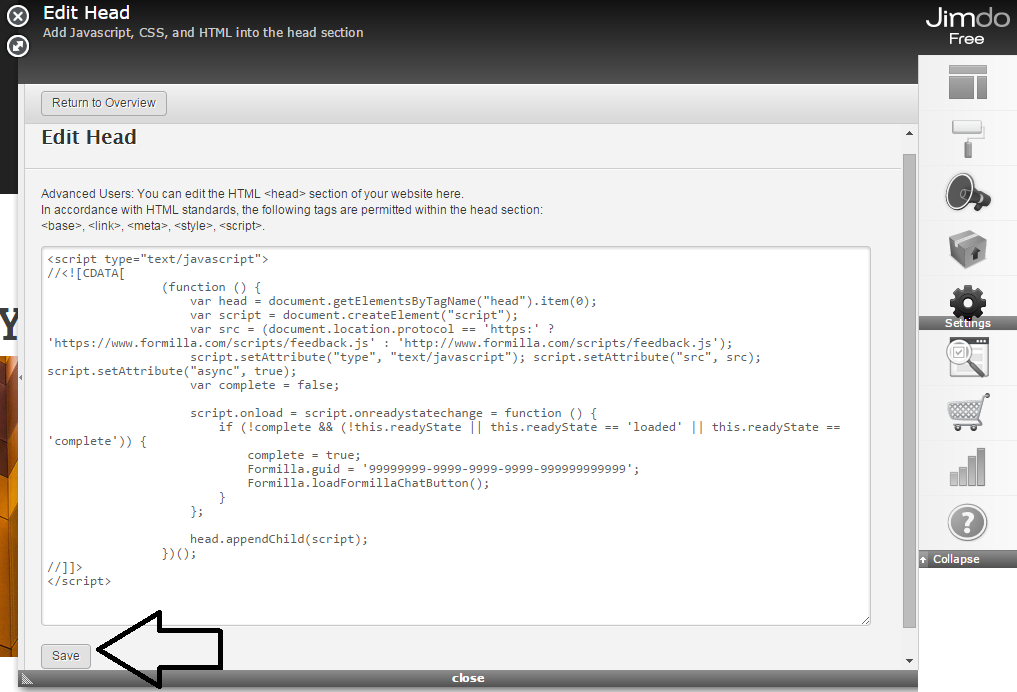
Now, you’re ready to paste the code snippet you obtained from step #1, and click the “Save” button.
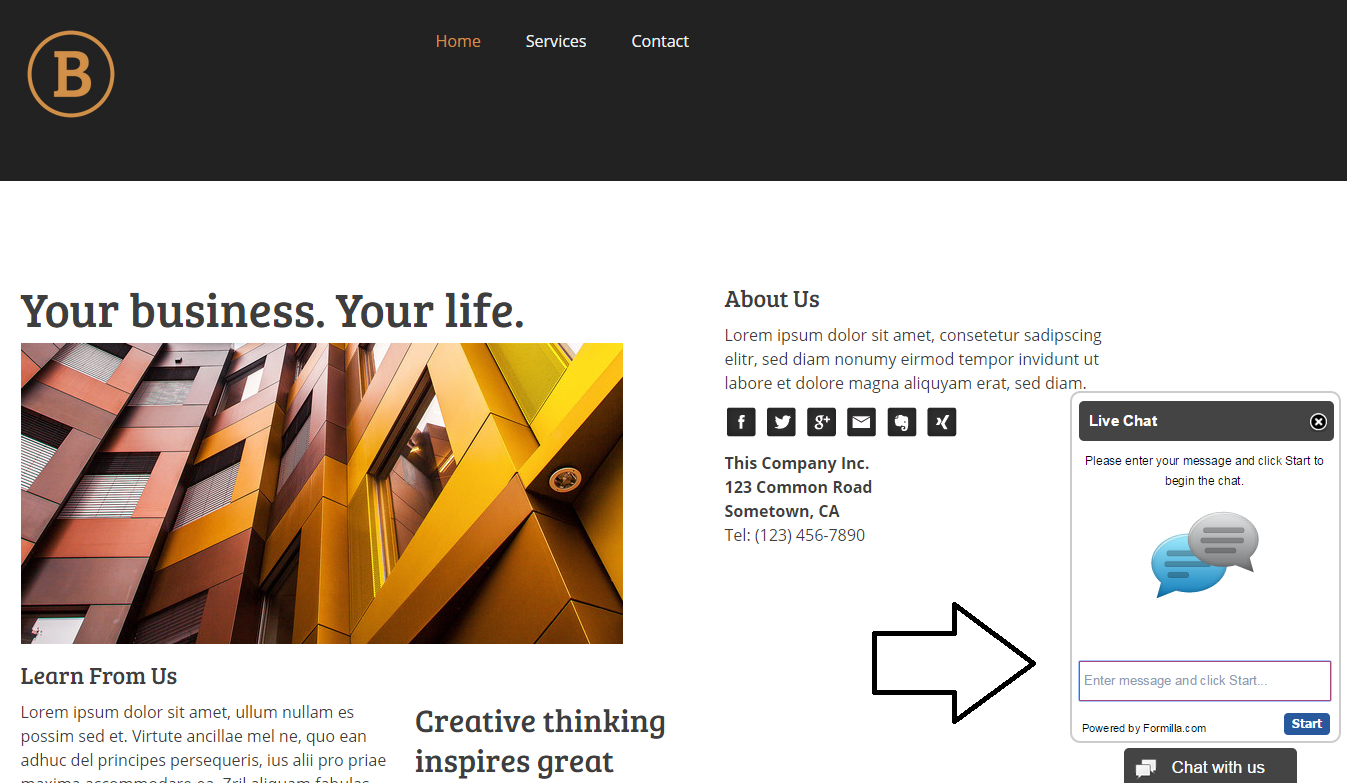
That’s it! You should see the live chat button on your website after refreshing, and you can initiate a chat with yourself as your first test! If you’re having any trouble, simply reach us at support@formilla.com and we’ll help you out!
Join the Formilla blog!
We offer actionable advice about live chat, chat bots, marketing automation, customer service, and sales. Sign up and we'll send you the best of the blog, from articles to infographics, every two weeks.