Helper Bots leverage ChatGPT’s incredible Artificial Intelligence technology to respond to visitor questions around the clock. You’ll see a huge improvement in your staff’s efficiency and dramatically boost customer satisfaction too. Your bot can be continually trained for better accuracy, and additional “Topics” can be added to improve its knowledge. Chatbots are available as a paid add-on for any of our current premium packages.
In this tutorial we will cover how to create a bot that is ready to respond to your website visitors. We will go over how to train your bot by adding Topics and touch on how the bot functions in a conversation with your visitor.
Watch our video tutorial if you prefer to see it in action:
Creating Your ChatGPT Bot
Inside your Formilla account, mouse over Automation and select ChatGPTBots from the sub-menu. Click on the Create ChatGPT Bot button.
Enter a name for your bot. You can select the default language for the bot as well. Click on Create my bot when finished.
Here on the Step 1/Topics tab, click on Add Topic to train your ChatGPT bot by adding a wide range of “Topics” your visitors may ask about regarding your products and/or services. Your bot will use this information when generating responses.
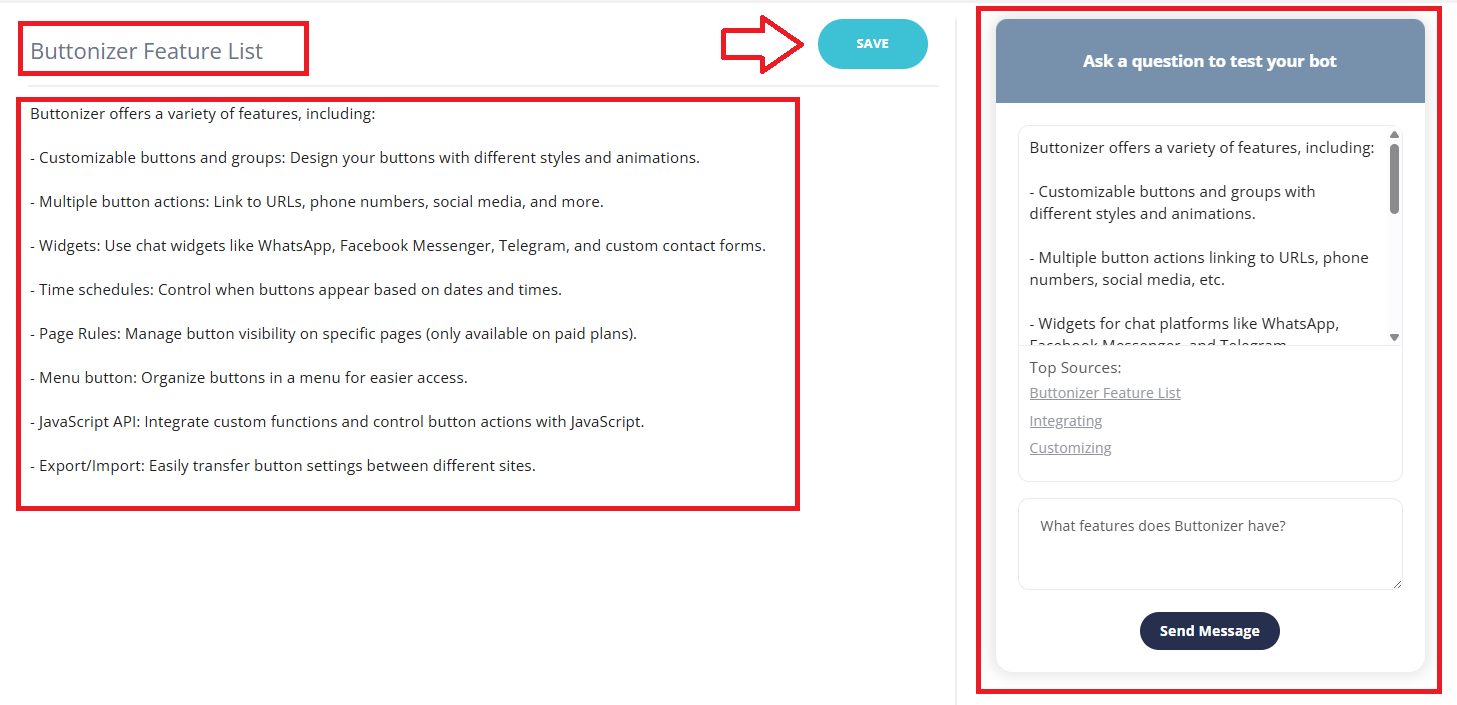
When creating each Topic, enter a heading at the top like you see in the screenshot below. For the Topic content/body, enter all the information for that Topic. For example, you’ll see in this case we have a product called Buttonizer and have set a Topic heading of Buttonizer Feature List. Notice for the training content, we summarized all the product features at a high-level, so the ChatGPT bot will be able to use this information when it generates its own responses. Be sure to click on Save and then test your bot on the right-hand side to make sure it’s successfully answering all the questions you expect customers to ask.
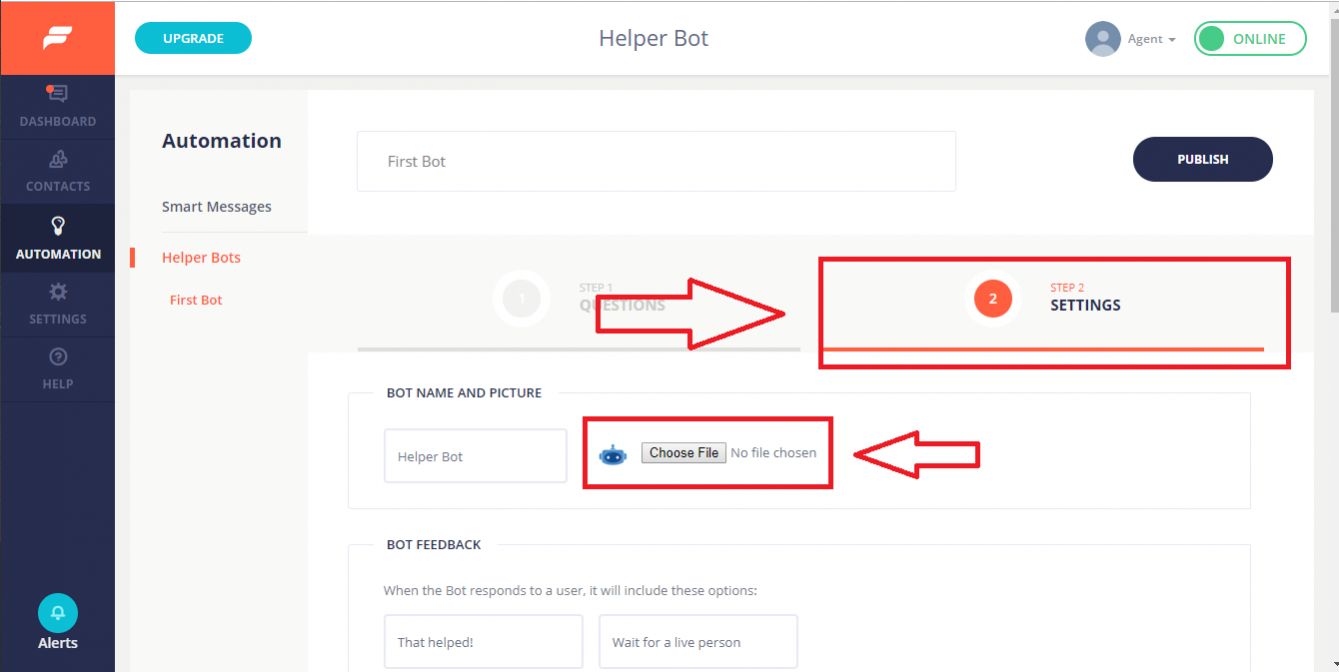
After you’ve entered all your Topics, click on the Step 2/Settings tab. In the first section you can name your bot (Helper Bot by default), which will be visible to website visitors in the chat window. You can also set an image for your bot by clicking on Choose File to upload an image. The default bot graphic will be shown if you choose not to upload an image of your own.
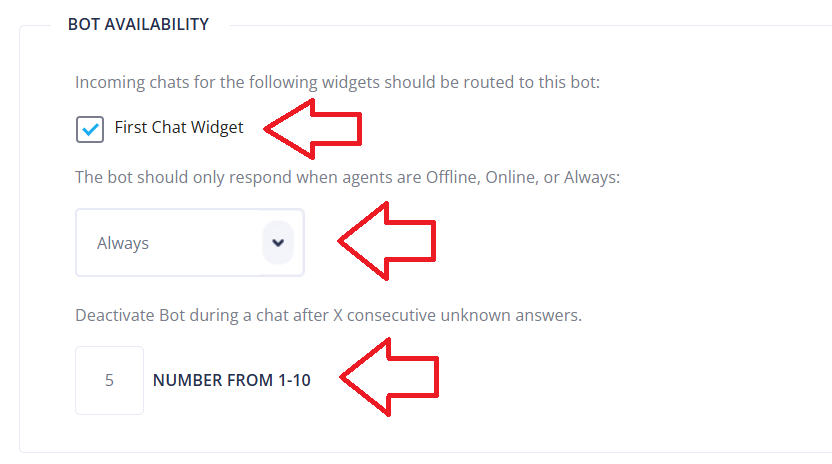
The next section is the Bot Availability section. Select the Widget(s) where you’d like your bot to respond to incoming questions. At least one widget must be selected, and no widget is selected by default. Notice, you can also determine whether the bot should Always respond to incoming questions (24×7), or whether you’d like it to respond while agents are Online or Offline. For example, if you want to closely review how it responds to visitors, especially in the beginning, you can set this to Online. If you’re happy with how it’s responding overall, you can set it to Always or Offline. For example, the main case where you’d use Offline is if you like to provide live human support when your staff is available, and only prefer to fallback on the bot after-hours. You can also set the number of unknown answers the helper bot gives before it deactivates.
In the Bot Settings section, you can set the preferred response length you’d like the bot to use. Medium is the default setting. Lastly, the No Match Response can be used to instruct the bot how to respond when it doesn’t know the answer to a question. This is a good place to include your office hours and other information to share with your visitor (keep it short though!).
Training Your ChatGPT Bot
The Train my Bot section is where you will want to go to periodically train your Helper Bot. The more Topics you add and keep expanding the content for each Topic, the smarter your bot will become. Conversely, without effort put into training the bot, it will continue to “miss” with answers. In addition to using the Train my Bot section whenever a common question comes in that you know is asked frequently but has not been added yet, it is a good idea to go through the Train my Bot section at regular intervals. Every few days is a good starting point, perhaps adjusting up or down depending on your chat volume.
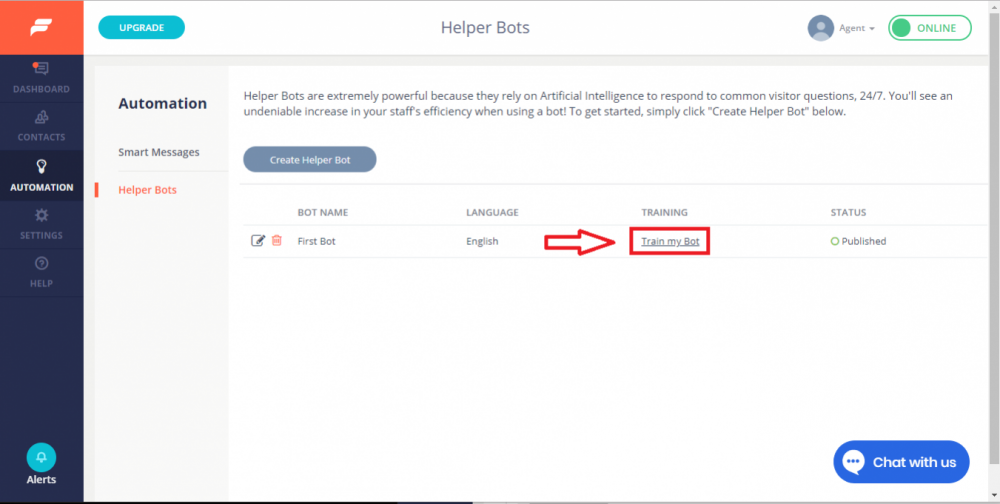
Access the Train my Bot section by mousing over Automation on the left, then clicking on ChatGPT Bots. Your bot will now appear with a Train my Bot link under the “Training” column. Click on this link to go to the Training screen.
In the Training section, you will see a list of phrases from recently completed chat sessions in the Untrained Message column. You can use the View Chat link to see the full chat context to better understand what the user was asking. Click Add Topic to create new training material that answers the question, or click the Edit your Bot button if you want to expand on an existing Topic.
Tips and Best Practices
When adding training information for your bot to use, each Topic should contain most of the information related to that subject matter. For example, if you have an E-commerce website and have a Return Policy, you can create a Topic named Return Policy and include your company’s policy as the content for that topic. When a user asks any question related to returns, the bot should find the answer in the Topic and produce a sufficient answer. Similarly, if you have Shipping information you’d like the bot to use, you can create a Shipping Topic and include all the relevant information in it.
Now, let’s say your a service provider (e.g. imagine a web development agency) and want to include detailed information about all your services. You can create a Topic for each service, such as Web Design, Custom Programming, Mobile App Development, etc. and each Topic would contain detailed information about each service. It would also make sense to have a general Topic such as Services that concisely summarizes each service in 1-2 sentences, so if users ask generic questions such as “what services do you provide?”, the bot will be much more successful answering that question if you added a high-level Topic that it can use to answer it.
Train your bot as often as possible! Review all messages or questions your bot wasn’t able to respond to so you can fill in any knowledge gaps and increase its success rate.
When reviewing the Train my Bot page, feel free to use the delete function to remove messages that do not apply to anything trained nor deserve a new Topic to be added. This way you can quickly clean up any low value messages and focus on the most important ones.
As always, please don’t hesitate to start a chat with us if you need any help configuring your bot, or with anything else!
Join the Formilla blog!
We offer actionable advice about live chat, chat bots, marketing automation, customer service, and sales. Sign up and we'll send you the best of the blog, from articles to infographics, every two weeks.